
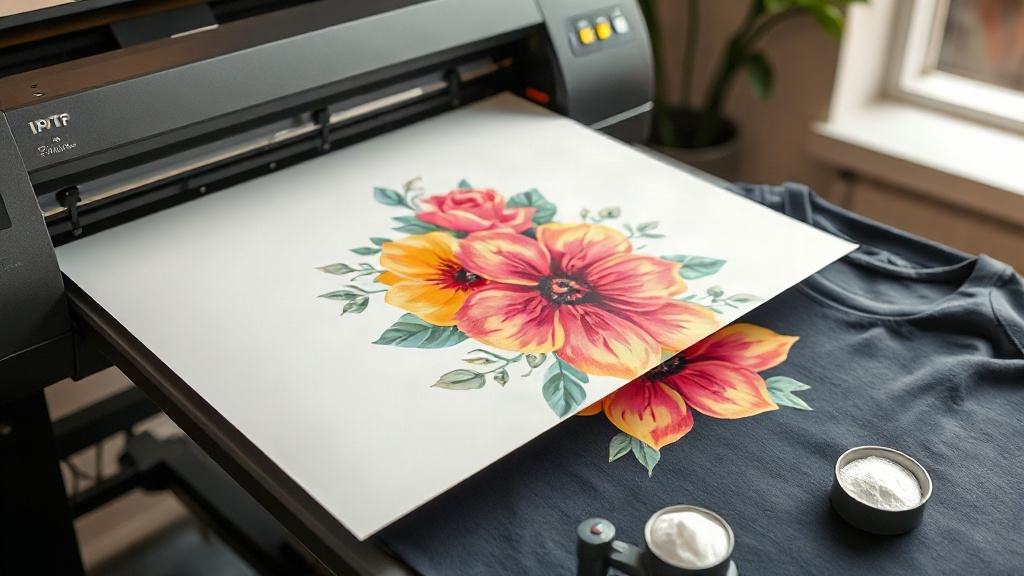
Imagine pressing a button and watching a full-color design transfer onto a cotton t-shirt in minutes, with no weeding, no masking, and no special fabric pretreatment. That's the promise of DTF printing, and it's why this technology has exploded in popularity among small business owners, crafters, and print shops alike. Unlike other methods that require specific fabric blends or expensive setup, DTF (Direct to Film) opens the door to printing on virtually any material, from 100% cotton to polyester, leather, and even wood. In this guide, I'll walk you through everything you need to know to get started, based on my own experience running a DTF setup for over two years.
What Exactly Is DTF Printing?
DTF stands for Direct to Film. It's a digital printing process where your design is printed onto a special transfer film, coated with a thermoplastic adhesive powder, and then heat-pressed onto the fabric. The magic happens because the powder melts and bonds the ink to the material, creating a stretchable, durable print that feels soft to the touch. Unlike DTG (Direct to Garment), which prints directly onto the shirt, DTF gives you the flexibility to print on almost any surface and store the transfers for later use.
Why Choose DTF Over Other Printing Methods?
If you're familiar with heat transfer vinyl (HTV) or screen printing, you might wonder what makes DTF special. Here are the key advantages:
- No weeding or masking: Say goodbye to tedious cutting and peeling. With DTF, you print, powder, and press. That's it.
- Works on any fabric: Cotton, polyester, blends, nylon, leather, and even treated wood. No need for special pretreatments.
- Full-color and photographic detail: Because it's a digital process, you can print gradients, fine lines, and photorealistic images with ease.
- Durability: When applied correctly, DTF prints outlast many other methods, surviving dozens of washes without fading or cracking.
- Cost-effective for short runs: No screens or setup fees, so you can profitably print one-off designs or small batches.
What Equipment and Supplies Do You Need?
Getting started with DTF requires a modest investment. Here's a breakdown of the essentials:
1. DTF Printer
You can buy a dedicated DTF printer (like those from Epson or Roland) or convert an existing inkjet printer with a DTF ink system. Dedicated printers are easier to maintain and produce consistent results, but they cost more. For beginners, a converted Epson EcoTank or similar model can be a budget-friendly entry point.
2. DTF Inks
These are not your standard inks. DTF inks are pigment-based and formulated to work with the adhesive powder. You'll need CMYK plus white ink. White ink is crucial because it acts as a base layer, allowing colors to pop on dark fabrics.
3. DTF Film
This is the transfer medium. It comes in sheets or rolls, and you need to use the correct side (usually indicated by a matte finish). Using the wrong side will ruin your print.
4. Adhesive Powder
Also known as hot melt powder, this is sprinkled onto the wet ink after printing. It's what makes the transfer stick to the fabric. There are different particle sizes; finer powders give a softer feel.
5. Heat Press
A quality heat press is non-negotiable. You'll need one that can reach at least 325°F (160°C) and maintain consistent pressure. A clamshell or swing-away press works fine; just make sure it's calibrated.
6. Curing Oven or Heat Gun
After powdering, the film needs to be cured to melt the powder. You can use a dedicated curing oven or a heat gun, but an oven gives more even results.
7. RIP Software
RIP (Raster Image Processor) software helps manage color profiles, white ink layering, and print settings. Some printers come with proprietary software, but third-party options like AcroRIP are popular.
Step-by-Step DTF Printing Process
Now that you have your gear, let's walk through the actual printing process. This is the workflow I use daily.
Step 1: Prepare Your Artwork
Start with a high-resolution image (300 DPI is ideal). Remove any background if you want a transparent design. In your RIP software, you'll set the white ink layer (usually under the color layer) and adjust color settings. For dark garments, you'll need a thicker white base.
Step 2: Print the Design
Load your DTF film into the printer with the correct side facing up. Send the job to print. The printer will lay down white ink first, then color. It's mesmerizing to watch, but resist the urge to touch the film immediately; the ink is wet.
Step 3: Apply Adhesive Powder
While the ink is still wet, sprinkle the adhesive powder generously over the printed area. Then shake off the excess. You can use a powder shaker for even distribution. The powder should stick only to the ink.
Step 4: Cure the Powder
Place the powdered film in a curing oven at around 320°F (160°C) for 2-3 minutes, or until the powder melts and becomes glossy. If using a heat gun, move it back and forth until the powder turns shiny. Don't overdo it; overheating can cause the film to curl.
Step 5: Press onto Fabric
Set your heat press to 325°F (160°C) with medium pressure. Place the transfer on the garment with the printed side down (film side up). Press for 15-20 seconds. Then, while it's still hot, peel off the film. You should see a vibrant, smooth print. If any areas lift, press again for a few seconds.
Step 6: Post-Press (Optional)
For extra durability, you can cover the print with a Teflon sheet and press again for 5-10 seconds. This helps the adhesive fully bond.
Common DTF Problems and How to Fix Them
Even with experience, you'll run into issues. Here are some frequent ones and their solutions:
- Print cracks after washing: Usually caused by insufficient powder or under-curing. Increase powder coverage and ensure the powder is fully melted.
- Colors look dull: Might be due to too little white ink or incorrect color profile. Check your RIP settings and ensure white ink is properly layered.
- Film jams in printer: DTF film is thicker than paper; adjust your printer's platen gap and feed settings. Also, keep the film flat and free of moisture.
- Adhesive powder not sticking: The ink may be too dry. Print with higher ink density or apply powder immediately after printing.
Tips for Better DTF Results
After countless trials, I've picked up a few tricks that make a big difference:
- Control humidity: DTF ink and powder are sensitive to moisture. Keep your workspace between 40-60% humidity.
- Use a lint roller: Before pressing, roll the garment to remove lint and dust. This prevents uneven adhesion.
- Test your press: Every heat press is different. Use a temperature gun to verify the actual platen temperature and adjust accordingly.
- Store transfers properly: Keep unused transfers in a cool, dry place, away from direct sunlight. They can last for months.
- Start with simple designs: Until you dial in your settings, avoid intricate details. Once you're confident, you can tackle complex artwork.
Frequently Asked Questions
How long do DTF prints last?
With proper application and care, DTF prints can last 50+ washes without significant fading or cracking. Always wash garments inside out in cold water and avoid harsh detergents.
Can I use DTF on dark shirts?
Absolutely. DTF excels on dark fabrics because the white ink base makes colors vibrant. Just ensure your RIP software is set to print a white underbase.
Do I need a special printer for DTF?
You can convert a standard inkjet printer with DTF inks and a film feed system, but dedicated DTF printers are more reliable and produce better results long-term.
What's the difference between DTF and DTG?
DTF transfers the design to a film first, then to the garment, while DTG prints directly onto the fabric. DTF works on more materials and doesn't require pretreatment, but DTG can be faster for 100% cotton items.
How much does it cost to start DTF printing?
Initial setup can range from $1,500 to $5,000 depending on whether you convert a printer or buy a dedicated one, plus supplies. It's a worthwhile investment if you plan to offer custom apparel.
Final Thoughts
DTF printing has revolutionized the custom apparel industry by making high-quality, full-color transfers accessible to everyone. Whether you're a hobbyist or a growing business, mastering DTF can open up new creative and revenue opportunities. Remember, practice makes perfect. Start with small projects, learn from mistakes, and soon you'll be producing stunning prints that impress your customers. For more tips and supplies, visit DTF Directly at dtfdirectly.com.