
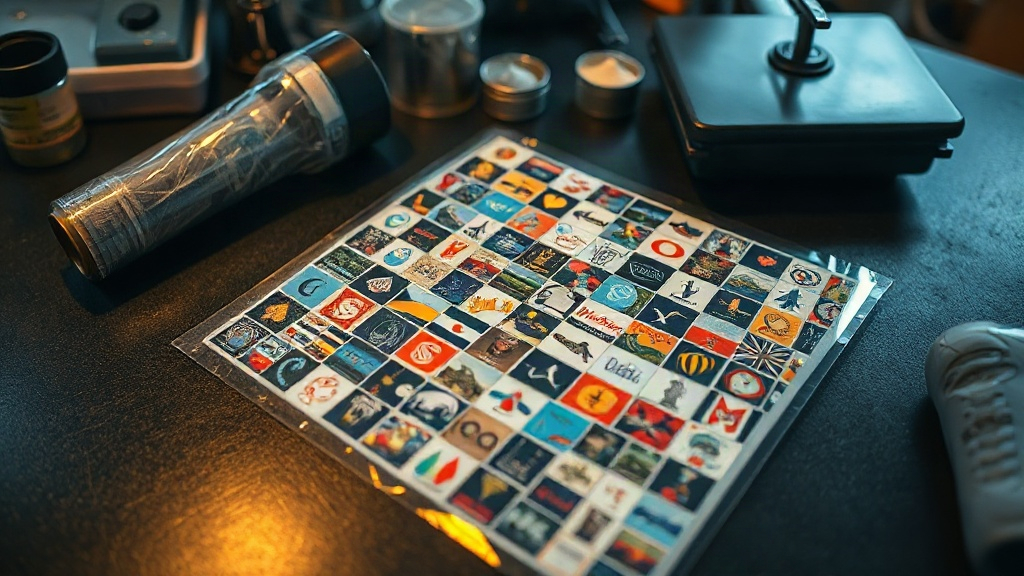
If you have ever finished a print run and looked at a pile of narrow film strips with half an inch of wasted ink on each side, you already understand why dtf gangsheets exist. A gangsheet is simply a large sheet of DTF film that holds many small designs at once instead of printing them one by one. The idea is not new. Screen printers have ganged up jobs on oversized screens for decades. What changed is that direct to film printing made the same logic available to shops running a single desktop printer and a heat press.
A well built dtf gangsheet lowers your cost per transfer, reduces film waste, and cuts the number of press cycles you have to babysit. A badly built one does the opposite: it jams your cutter, wastes powder, and forces you to reprint. The difference comes down to a handful of decisions you make before you ever hit print.
What Actually Happens on a DTF Gangsheet
A dtf transfer is built in layers. The printer lays down white ink first, then color on top, all on a PET film coated with a release agent. While the ink is still wet, adhesive powder is sprinkled across the surface, shaken off, and cured. The result is a flexible transfer that can be pressed onto cotton, polyester, blends, canvas, and even some nylon.
When you gang multiple designs onto one sheet, nothing about that chemistry changes. You are still printing white, then color, then powder. What changes is the layout. Instead of one design occupying a 12 by 16 inch sheet, you might fit fifteen small logos, a dozen name tags, and a couple of left chest prints on the same piece of film.
The savings stack up in three places. Film is sold by the sheet or by the roll, so larger sheets use the material more efficiently. Powder is applied across the whole sheet at once, so a full sheet uses less powder per design than a mostly empty one. And your printer runs fewer jobs, which means fewer warm up cycles and less wear on the printhead.
Building a Gangsheet That Does Not Fight You
Start With the Press, Not the Printer
Most people design their dtf gangsheet around what fits on the film. That is backwards. Your press platen sets the real limit. If you are pressing on a 16 by 20 inch platen, a sheet larger than that is useless because you cannot press it in one pass. Size your film to your platen, then fill the space.
A common setup for a shop running a 16 by 20 press is a 13 by 19 inch gangsheet. It fits comfortably, leaves a small margin for handling, and still holds a surprising number of small designs.
Leave Real Gaps Between Designs
Designs that touch each other are a nightmare to cut and press. Leave at least a quarter inch of clear film between every element, and half an inch if you are cutting by hand with scissors. If you are using a vinyl cutter or a plotter with a contour cut, the gap matters even more because the blade needs room to travel.
Add a small border around the outer edge of the sheet too. Film edges curl slightly during curing, and designs printed right at the edge are the first to lift.
Group by Ink Coverage
This is the tip most guides skip. White ink is the expensive layer in dtf printing. If you put a design with heavy white coverage next to a design with almost none, your powder application and curing time become a compromise that suits neither.
Try to group designs with similar ink density on the same sheet. Light coverage designs together, heavy coverage designs together. You will get more consistent adhesion and fewer surprises at press time.
Mind the Grain of the Film
PET film has a slight directionality. If you rotate a design 90 degrees on the sheet, it can stretch a fraction differently during pressing. For most small logos this is invisible. For long text banners or detailed line art, keep everything oriented the same way.
Nesting, Spacing, and the Numbers That Matter
Nesting is the art of arranging irregular shapes so they waste as little film as possible. The simplest version is rotating designs to fill gaps. A slightly better version is grouping similar shapes. The best version is software that calculates the optimal layout for you.
If you are doing this manually, here is a practical workflow:
- List every design with its finished size and quantity.
- Sort by height, tallest first.
- Place the tallest design in the top left corner.
- Fill the remaining space to the right with the next tallest that fits.
- Move to the next row and repeat.
- Rotate small square designs to fill leftover gaps at the bottom.
This shelf packing method is not mathematically perfect, but it beats eyeballing and usually gets you within ten percent of optimal.
When you price a dtf gangsheet, work backwards from the sheet. If a 13 by 19 inch sheet costs you a dollar in film, a dollar in ink, fifty cents in powder, and a few minutes of press time, your true cost per square inch is easy to calculate. Divide by the number of designs on the sheet and you have your real cost per transfer. Most shops find that a well packed gangsheet brings the cost per small logo under a quarter.
Common Mistakes That Ruin a Gangsheet
The most frequent problem is overfilling. People pack designs right to the edge to squeeze out every square inch, then discover the outer designs do not press cleanly because the film edge curled or the powder did not cure evenly. Leave a margin. It costs you a few cents and saves you a reprint.
The second mistake is mixing very different ink loads on one sheet. We covered this above, but it bears repeating because it is the single biggest cause of inconsistent results.
The third mistake is forgetting to mirror the artwork. DTF transfers are pressed face down, so every design must be mirrored before printing. If you are building a gangsheet from a template, check that mirroring is applied to the whole sheet, not just the first design.
The fourth mistake is skipping a test press. Every new film batch, powder batch, or fabric type deserves one test press before you commit a full gangsheet. Press one small design, wash it twice, and check the adhesion. It takes ten minutes and prevents a lot of angry emails.
When Gangsheets Stop Making Sense
Gangsheets are excellent for small designs in volume: names, numbers, logos, bachelorette party graphics, team jerseys. They are less useful when you have one large back print that fills the entire sheet on its own. In that case, a single design sheet is simpler and just as efficient.
They also stop making sense when your designs vary wildly in color and ink density and you cannot group them. If every design on the sheet needs a different curing time, you are better off printing them separately.
The sweet spot is a shop that runs a steady stream of small to medium designs with repeat customers. That is where a well planned dtf gangsheet pays for itself many times over.
Frequently Asked Questions
How many designs fit on a standard dtf gangsheet?
It depends entirely on design size. A 13 by 19 inch sheet can hold anywhere from one large back print to forty small left chest logos. For planning purposes, assume you can fit roughly the same total square inches of design as the sheet area minus about fifteen percent for gaps and margins.
Can I mix different fabric types on the same gangsheet?
Yes. The transfer itself is the same regardless of what you press it onto. What changes is the pressing temperature and time. Cotton, polyester, and blends all press at slightly different settings, so you may need to press the same sheet at different settings for different garments. That is fine as long as you cut the designs apart first.
What is the best way to cut a gangsheet?
For small quantities, sharp scissors or a rotary cutter work fine. For production, a vinyl cutter with a contour cut is much faster. Some shops also use a guillotine trimmer for straight line designs. Whichever method you choose, cut with the film flat and supported so the designs do not shift.
How long can I store a printed gangsheet before pressing?
Properly cured and stored in a cool, dry place away from direct sunlight, a gangsheet keeps for several months. Humidity is the main enemy. If you live in a humid climate, store sheets in a sealed bag with a desiccant packet. Press a test design if a sheet has been sitting for more than a couple of months.
Does a gangsheet cost less per transfer than individual prints?
Almost always, yes. The savings come from film, powder, and printer time. A full sheet uses material far more efficiently than a series of small sheets, and the per design cost drops sharply as you fill the sheet. The only exception is when a design is so large that it fills the sheet on its own, in which case there is nothing to gang.